Production-Ready in Minutes: The Ultimate Real-Time Pre-Launch AWS EC2 Checklist for CloudOps Engineers


Table of contents
- 📚 Abstract
- 📋Prerequisites:
- 💡 Plan of Execution
- 1️⃣ Calculate the cost for EC2 and KMS Services.
- 2️⃣Obtain necessary approvals from the Delivery Manager/Client to launch the instances
- 3️⃣Select the region based on the requirements.
- 4️⃣Create a KMS Key.
- 5️⃣Generate the PEM/PPK keys.
- 6️⃣Configure the security groups.
- 7️⃣Launch EC2-Instance: Establish a proper naming convention for your instances to ensure easy identification
- 8️⃣Don’t forget to provide the necessary tags.
- 9️⃣Choose the appropriate Amazon Machine Image (AMI).
- 🔟Select the Instance Type.
- ⓫ Choose the Key Pair.
- ⓬ Configure the Network Settings?
- ⓭ Specify the storage configuration.
- ⓮ Adjust the storage settings if necessary
- ⓯ Choose encryption settings and select the appropriate KMS key.
- ⓰ Verify the Shutdown behavior.
- ⓱ Enable termination protection?
- ⓲ Enable the stop protection if needed.
- ⓳ Choose CloudWatch Monitoring?
- ⓴ Choose the metadata version.
- Conclusion :
📚 Abstract
Learn how to launch cloud services quickly and confidently with our guide. This checklist will help CloudOps Engineers make sure their systems are ready for action in no time. Discover real-time tips and best practices to simplify your work and improve your cloud operations.
📋Prerequisites:
Access to AWS Console: Ensure you have access to the AWS Management Console with the necessary permissions to create and manage EC2 instances.
Technical Knowledge: A foundational understanding of AWS services, EC2 instances, and cloud architecture is essential.
Valid AWS Account: You should have an active AWS account with billing and payment information configured.
Security and IAM: Familiarize yourself with AWS Identity and Access Management (IAM) to manage user access and permissions securely.
Instance Specifications: Determine the specific requirements for your EC2 instance, such as instance type, region, and key pair for SSH access.
💡 Plan of Execution
1️⃣ Calculate the cost for EC2 and KMS Services.
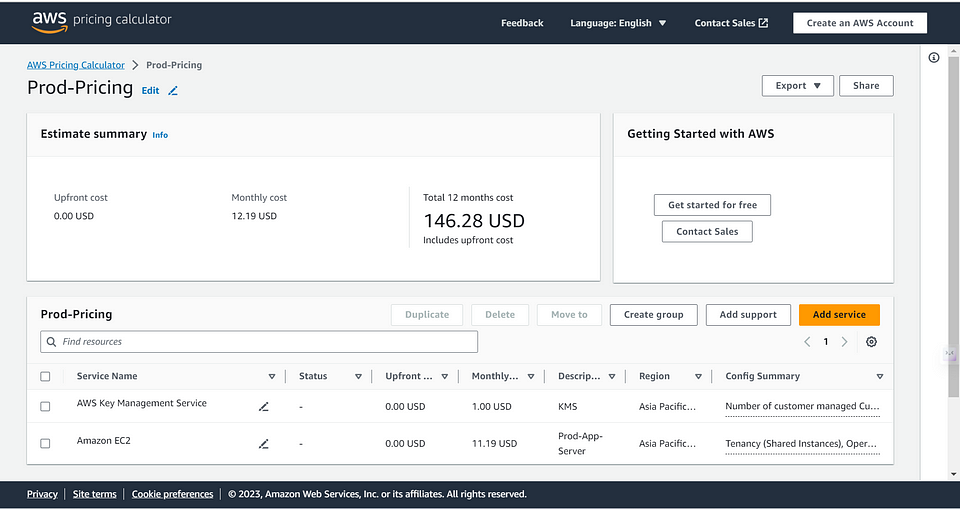
Determine the estimated costs associated with running EC2 instances and using a Key Management Service (KMS) for encryption.
I have created a sample AWS Pricing Calculator for EC2 and KMS which would cost per month and Annually cost with the basic configurations.
2️⃣Obtain necessary approvals from the Delivery Manager/Client to launch the instances
Obtain necessary approvals from the Delivery Manager/Client to launch the instances: Ensure you have the required permissions and approvals from relevant stakeholders before launching instances.
3️⃣Select the region based on the requirements.
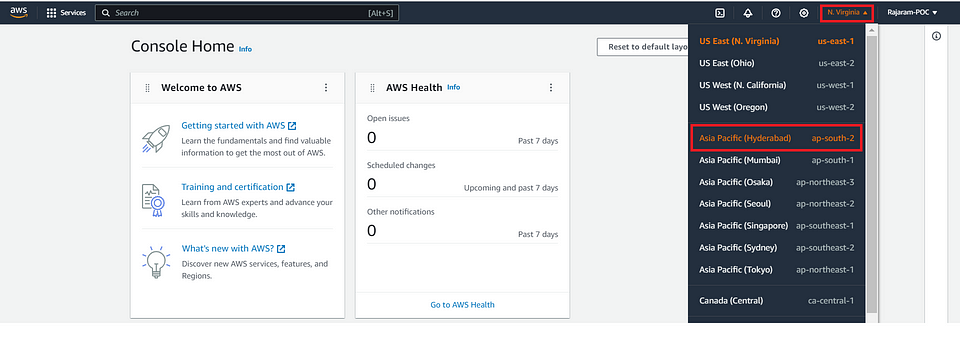
Choose the AWS region that best suits the geographical and performance needs of your application.
Note: Am choosing My Region as Asia Pacific(Hyderabad) — ap-south-2
4️⃣Create a KMS Key.
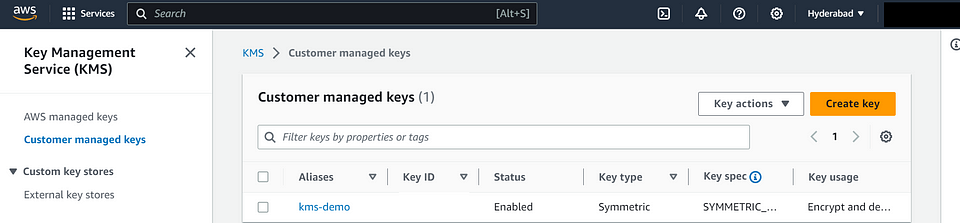
Establish a Key Management Service (KMS) key to encrypt and protect sensitive data. Please refer to the detailed blog on how to create KMS “here”
5️⃣Generate the PEM/PPK keys.
Create key pairs for secure SSH access to your instances, either in PEM or PPK format.
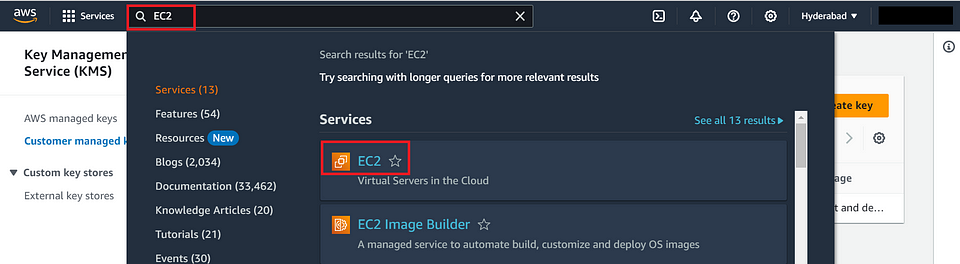
Navigate to the EC2 Dashboard :
In the AWS Management Console, type “EC2” in the search bar.
Click on “EC2” in the results to access the EC2 dashboard.
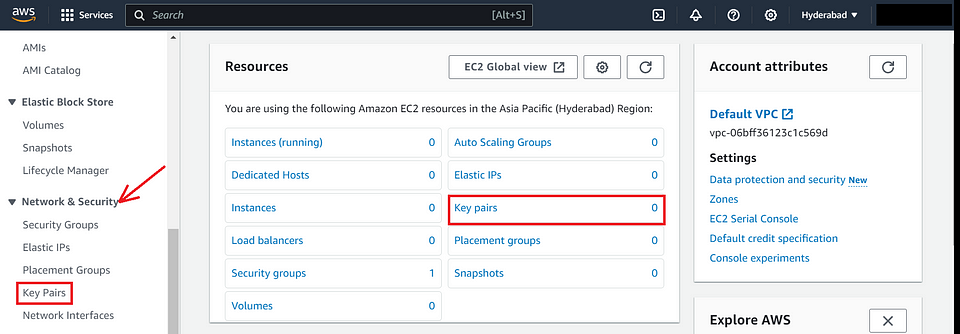
Access Key Pairs :
- In the EC2 dashboard, click on “Key Pairs” under the “Network & Security” section in the left-hand navigation pane.
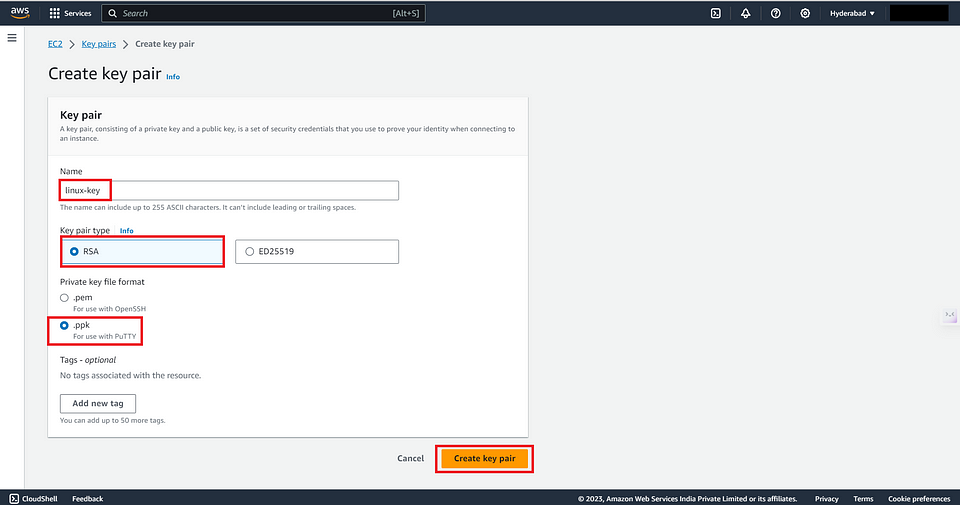
Create a New Key Pair :
- Click the “Create Key Pair” button.

Provide a Key Pair Name :
Give your key pair a unique name.
Select the file format for the private key. Choose “ppk” for PuTTY.
Click the “Create Key Pair” button to generate the key pair.
The private key (.ppk) will be automatically downloaded to your computer.
- Now you have successfully created and converted an AWS key pair to a PuTTY Private Key (PPK) format. You can use this PPK key with PuTTY to securely connect to your AWS instances.

6️⃣Configure the security groups.
Navigate to the EC2 Dashboard
In the AWS Management Console, type “EC2” in the search bar.
Click on “EC2” in the results to access the EC2 dashboard.
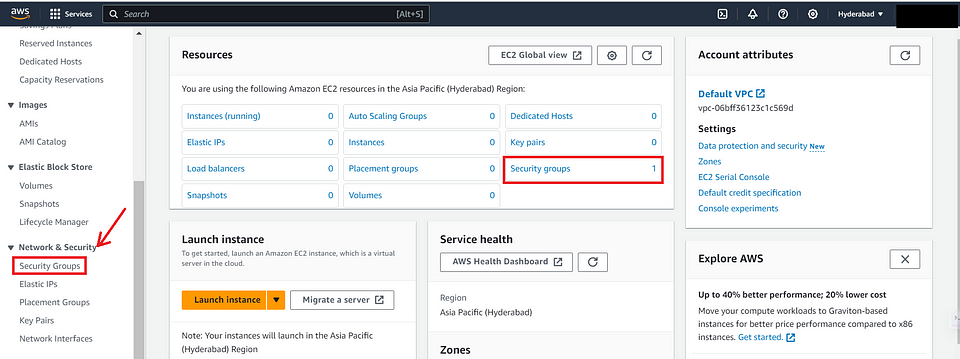
Access Security Groups
- In the EC2 dashboard, click on “Security Groups” or under the “Network & Security” section in the left-hand navigation pane. click on “Security Groups”.
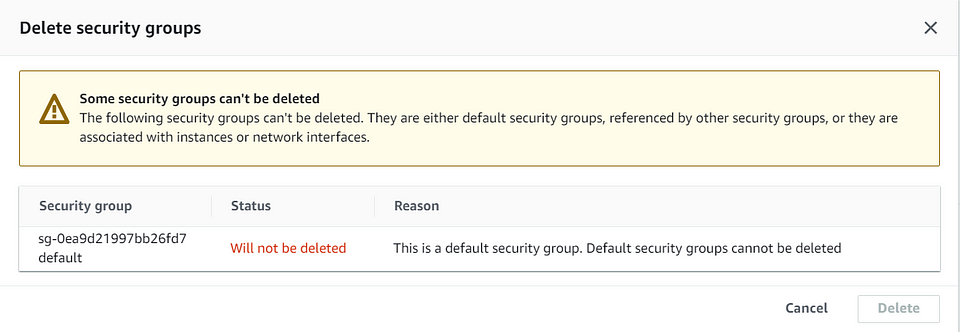
Note : We cannot delete the default security group
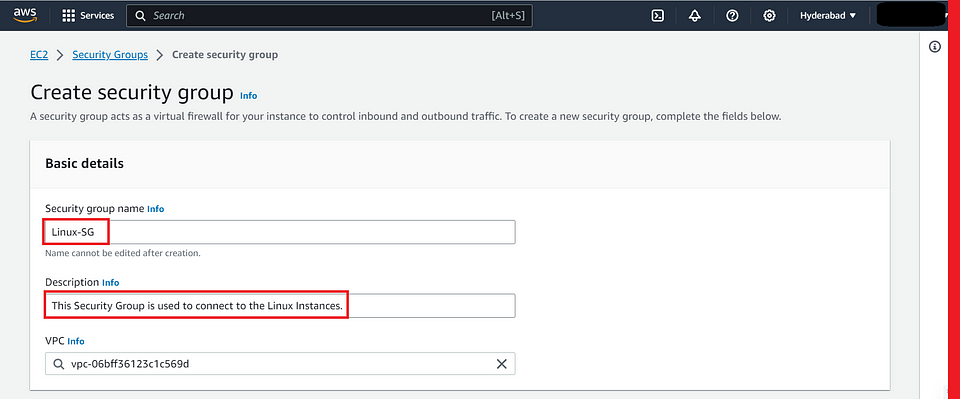
Create a New Security Group
- Click the “Create Security Group” button.

- Provide the Security Group Name and Description under Basic details.
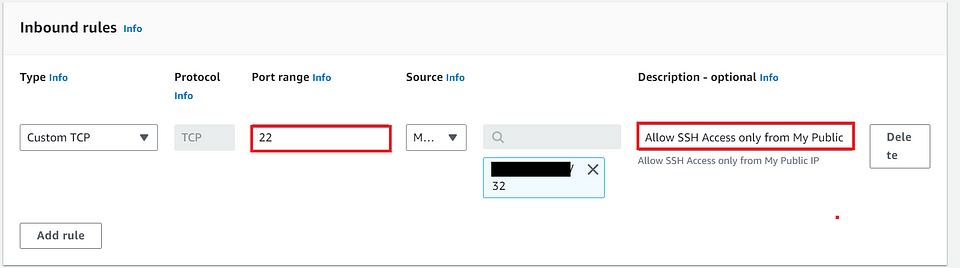
- In Inbound Rules — Allow Port: 22, choose My Public IP from the drop-down and give the Description.
- In Outbound Rules: Keep the default setting and Click on “Create Security Group Button”
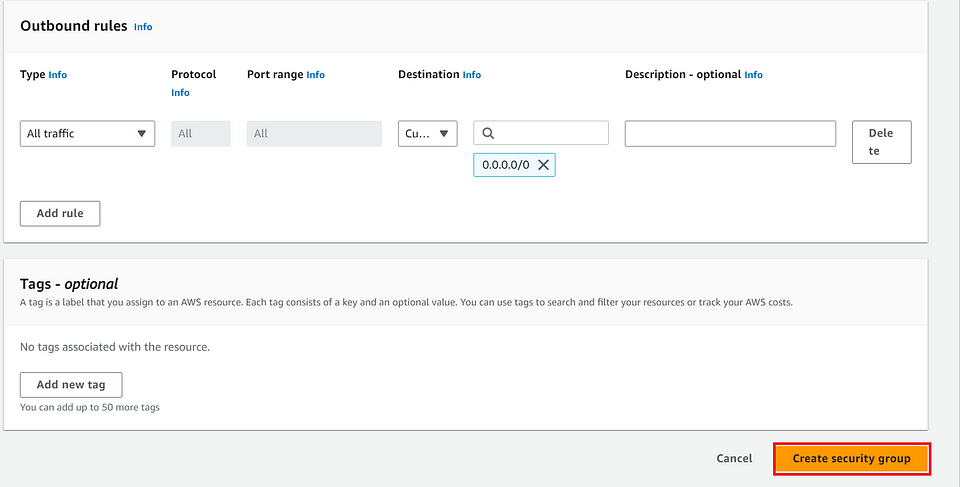
- AWS Security Group is now created and we will associate it with our new instances. It controls inbound and outbound traffic based on the rules you defined. Make sure to configure the rules to meet your specific security and access requirements for your AWS resources.

7️⃣Launch EC2-Instance: Establish a proper naming convention for your instances to ensure easy identification
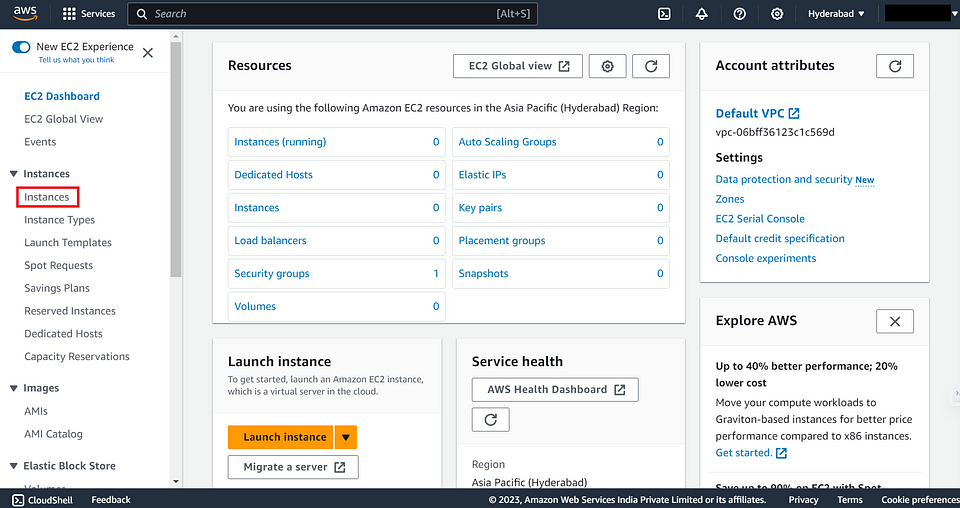
Navigate to the EC2 Dashboard
In the AWS Management Console, type “EC2” in the search bar.
Click on “EC2” in the results to access the EC2 dashboard.
Launch an Instance
- In the EC2 dashboard, click the “Instances” link in the left-hand navigation pane.
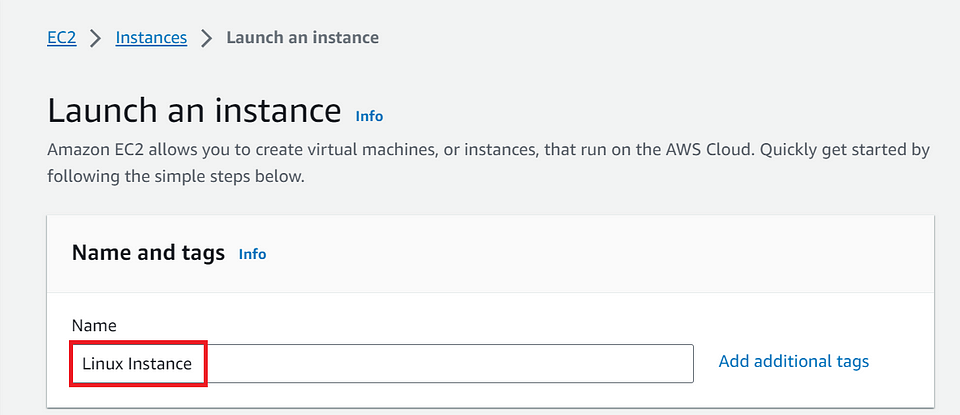
Launch Instance
- Click the “Launch Instance” button to start the instance creation process.
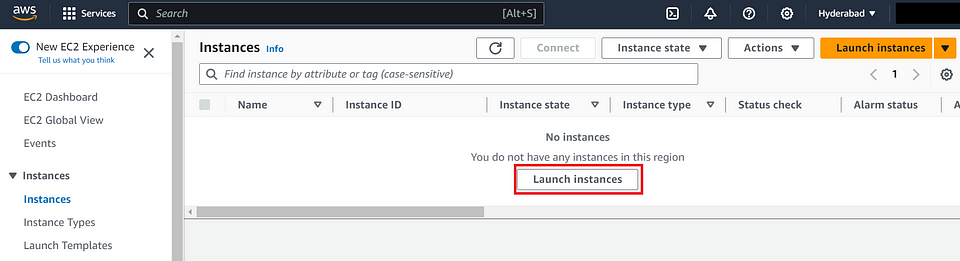
- Provide the Name for an Instance to identify it easily.
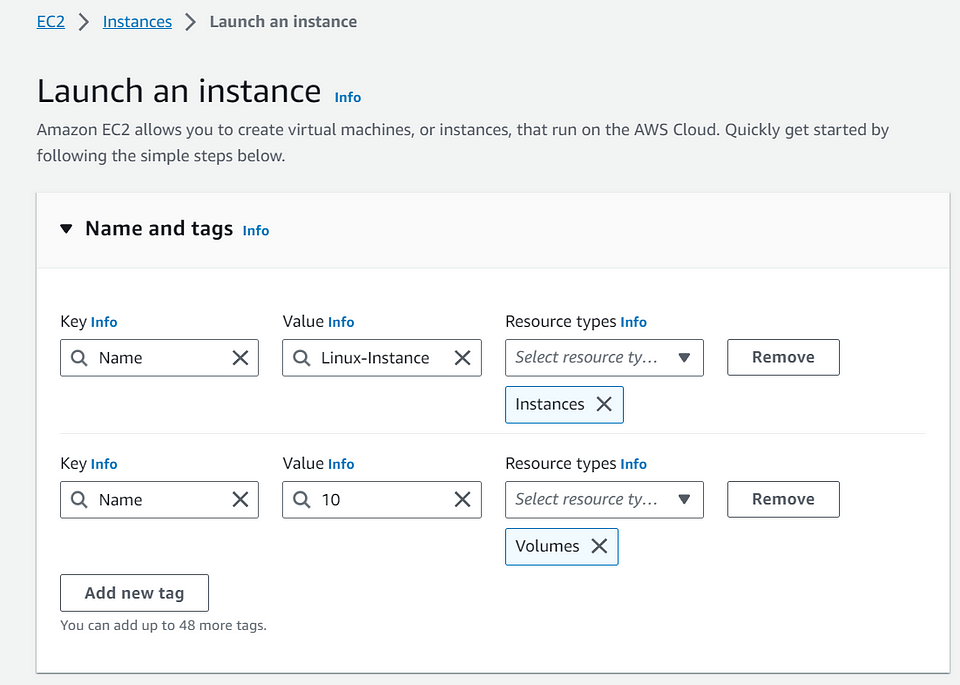
8️⃣Don’t forget to provide the necessary tags.
- Click On Tag. Provide key and value to identify it later.
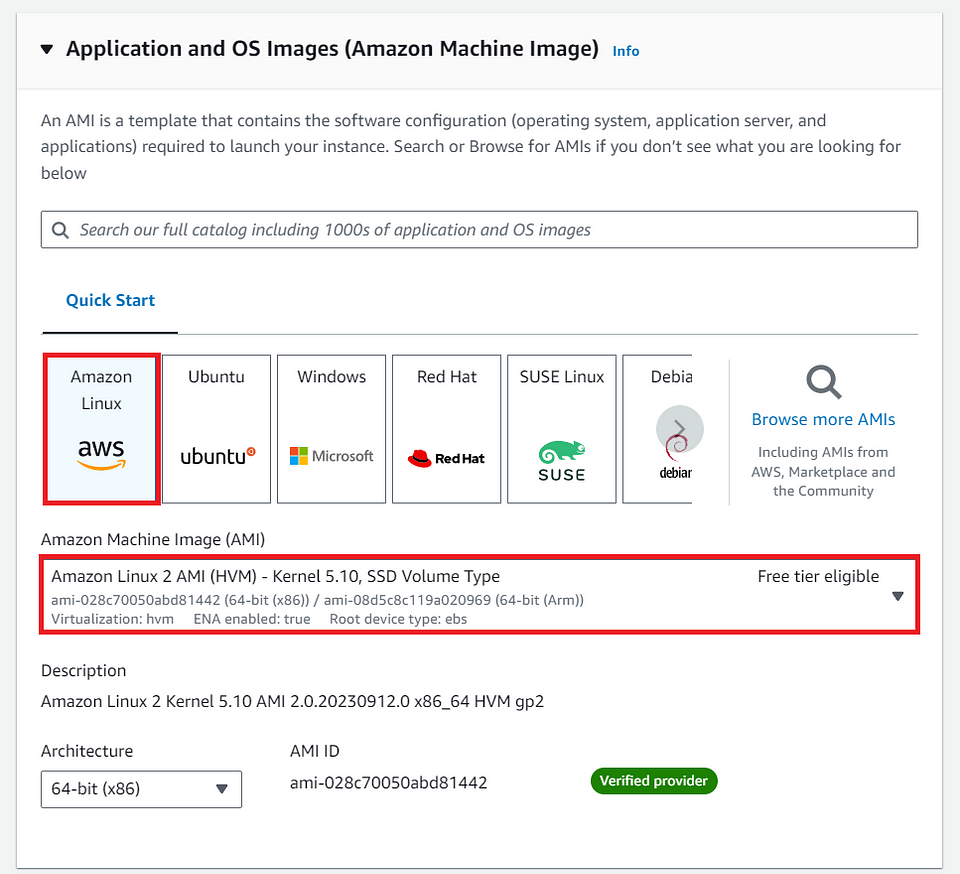
9️⃣Choose the appropriate Amazon Machine Image (AMI).
In the “Choose an Amazon Machine Image (AMI)” step, select an AMI that corresponds to your operating system and application requirements.
Click the “Select” button.
Note: Here, I Have selected AMI as “Amazon Linux 2”
🔟Select the Instance Type.
Choose an Instance Type
- In the “Choose an Instance Type” step, select the instance type that suits your computing and resource needs.
Note: Am choosing the default instance (t3.micro) and which is Free tier eligible.

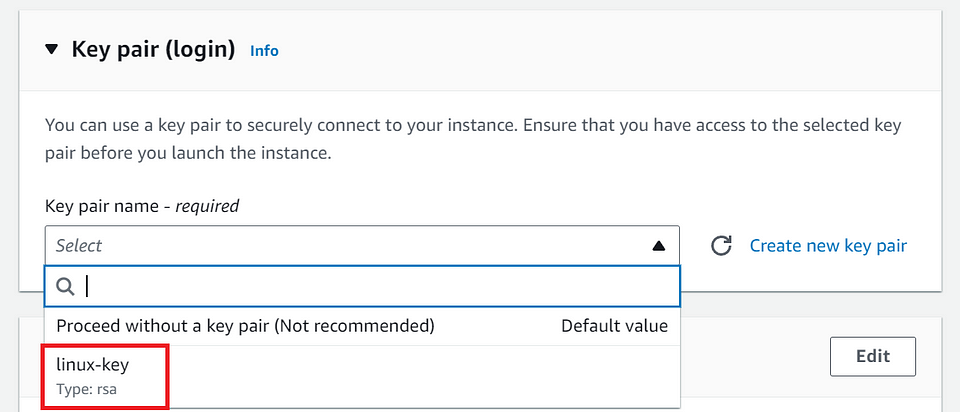
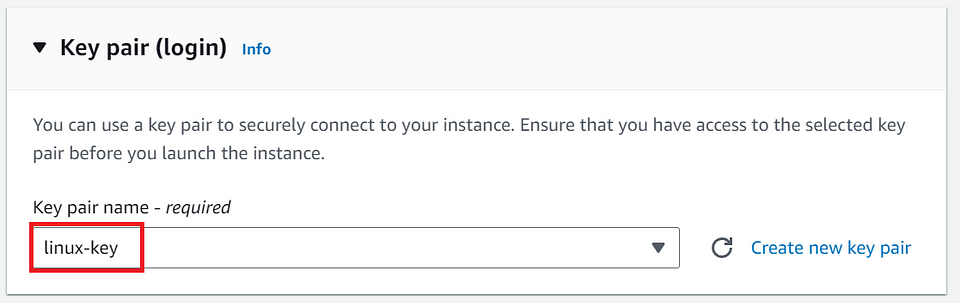
⓫ Choose the Key Pair.
If you haven’t created a key pair previously, you’ll be prompted to create one for secure access to your instance.
We have already created one key pair. So we will Choose an existing key pair from the drop-down.
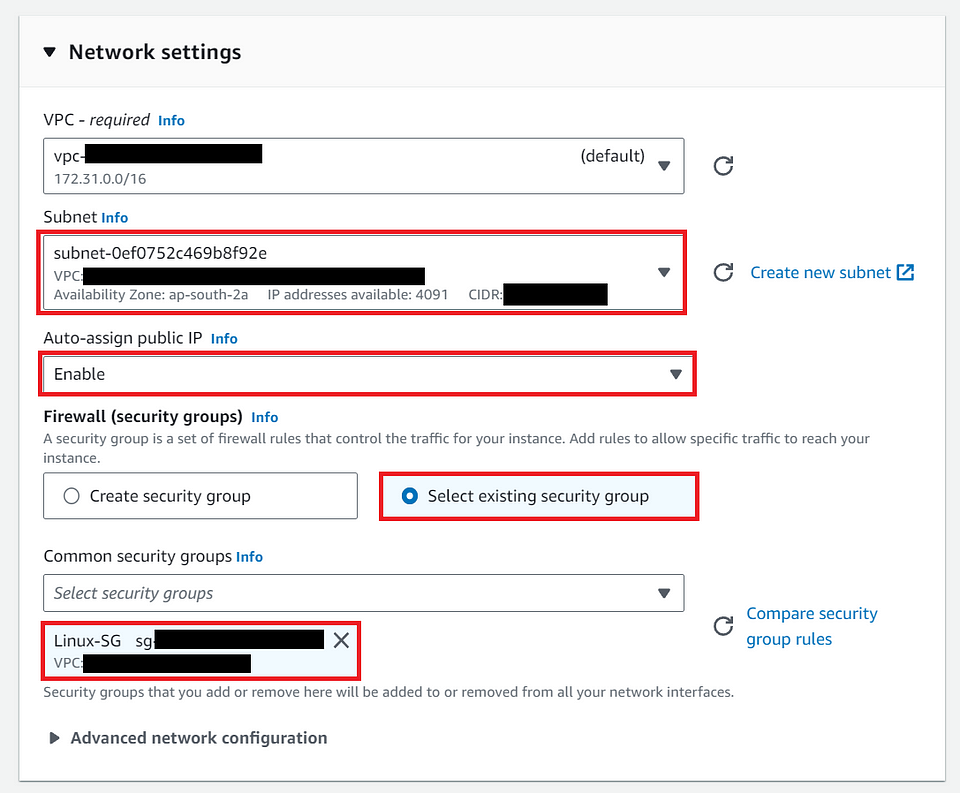
⓬ Configure the Network Settings?
- In the “Network settings” step, Click on the “Edit” Button
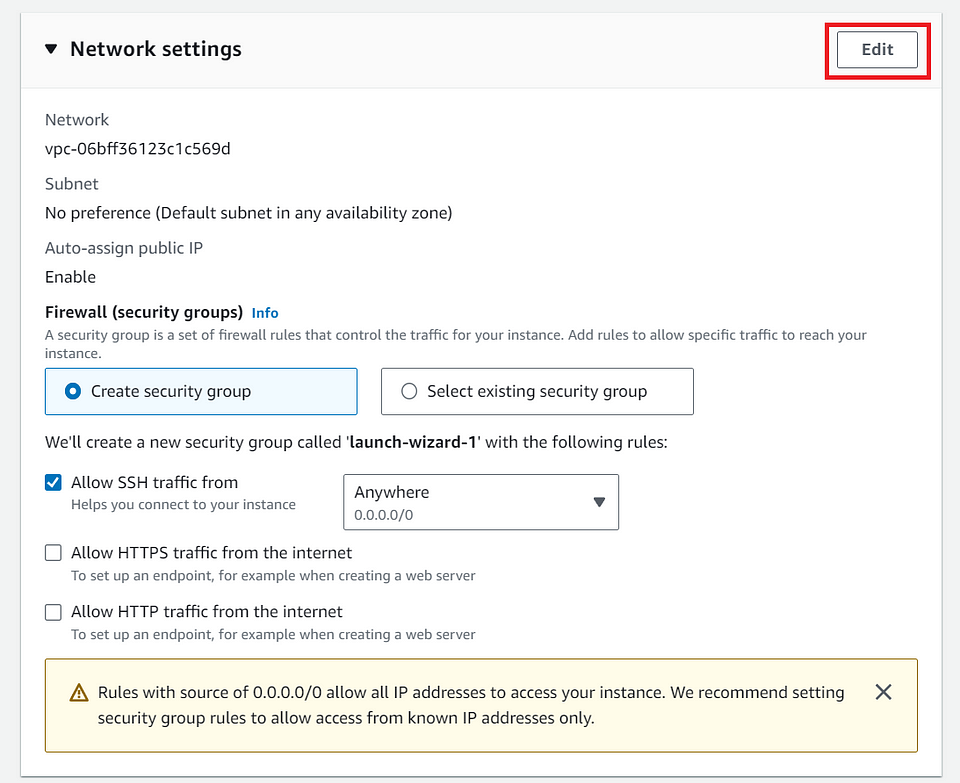
VPC: Keep the setting By default.
Subnet: Choose any one of the drop-downs, or you can leave it as “No Preference” AWS will randomly one subnet while launching the instance.
Note: I’m choosing “ap-south-2a” for now. Just choose as per my preference.
Auto-assign public IP: choose as “ Enable”, this is required while connecting to the Instance.
Firewall(security groups): choose “ Select existing security group”
Note: I’m choosing “Linux-SG”, as I created the Security group earlier and allowed the required Inbound and Outbound rules which are required as per the Business requirement.
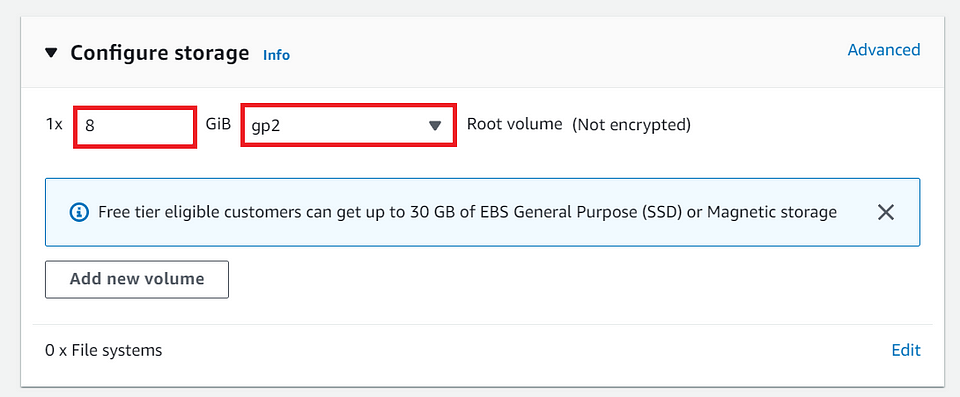
⓭ Specify the storage configuration.
- In the “Configure Storage” step, configure the size and type of storage volumes for your instance. You can add additional volumes if needed.
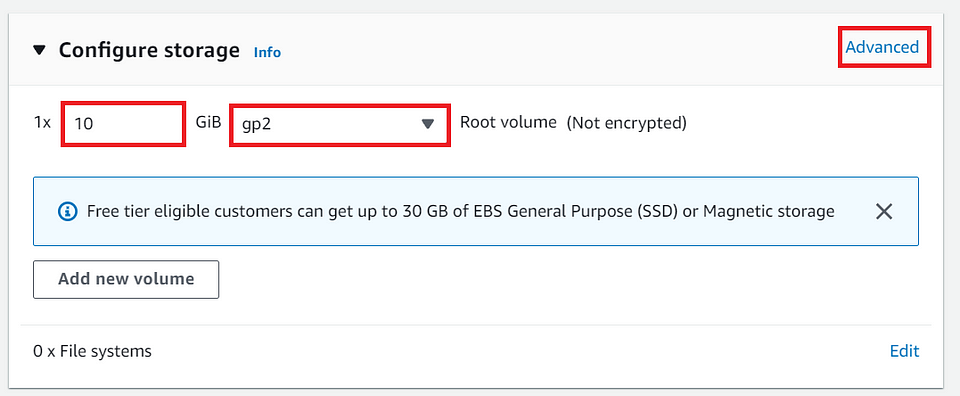
⓮ Adjust the storage settings if necessary
Note: For now, am want to have Storage as 10 GiB and choose the type as “gp2”. Then Click on “Advanced”
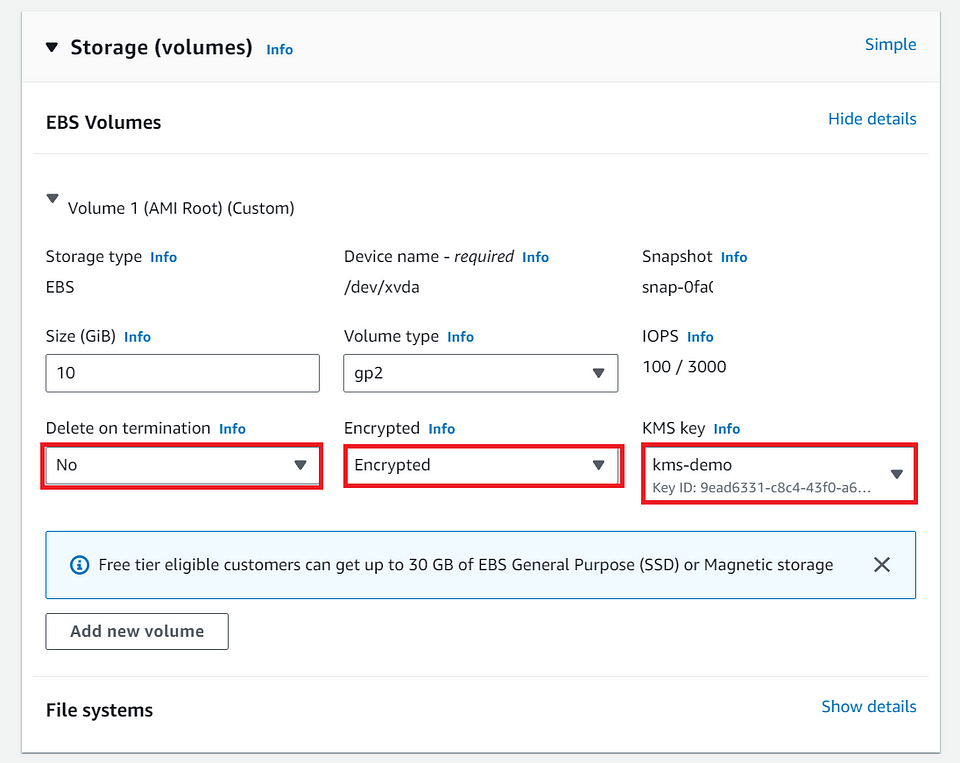
⓯ Choose encryption settings and select the appropriate KMS key.
In the “Storage(Volumes)” step,
- Delete on termination: No (If we terminate the instance by mistake, we can restore the volume as the volume will not be terminated if we choose No).
Note: As part of Cost-Optimization, we have to manually go and delete the volume if it's not necessary.
Encrypted: Choosing “Encrypted” ( The data which is being stored in this volume will be more secure)
KMS Key: Choosing the “kms-demo” (I have chosen this because, it's a customise KMS key and am not using the default KEY that AWS Provides, This way our data would be much safer and the key will be with us)
Note: Golden Rule: When it comes to DATA, Never trust any source.
⓰ Verify the Shutdown behavior.
- In the “Advanced Settings” step, Under Shutdown behavior — Always Choose the “Stop” from Drop-down.
Note: If we choose “terminate”, when we stop the instance, instance will get terminated.

⓱ Enable termination protection?
- Enabling termination protection for an EC2 instance in AWS is a security feature that helps prevent accidental termination of the instance. Here’s how you can enable termination protection for an EC2 instance:

⓲ Enable the stop protection if needed.
Enabling “Stop Protection” for an EC2 instance prevents accidental stopping of the instance, providing an extra layer of protection.
To enable “Stop Protection,” follow these steps: Choose “Enable” from the drop-down.

⓳ Choose CloudWatch Monitoring?
- AWS CloudWatch provides monitoring and management services for AWS resources, including EC2 instances.
Note: This will also add cost.

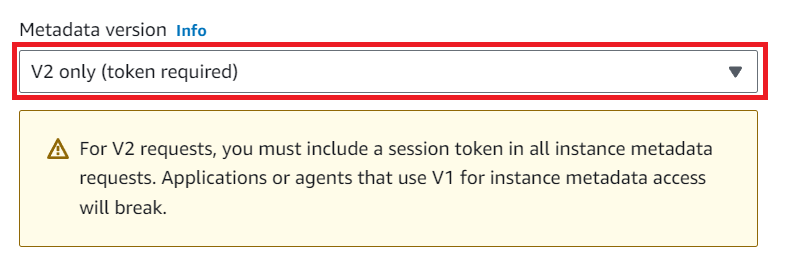
⓴ Choose the metadata version.
Metadata Version 2 token-only offers enhanced security, it’s essential to carefully implement it within your applications and scripts to ensure proper token handling. This choice ultimately depends on your security requirements and risk tolerance, but in many cases, selecting V2 token-only is the recommended and more secure option.
Selecting the Metadata Version 2 (V2) token-only option over Metadata Version 1 (V1 and V2) can provide several advantages, depending on your use case.
Enhanced Security:
V2 token-only provides a more secure approach to accessing instance metadata by requiring an authorization token.
With V1 and V2, metadata is accessible without authentication, potentially exposing sensitive information if an attacker gains access to an EC2 instance.
Reduced Attack Surface:
By using V2 token-only, you reduce the attack surface of your EC2 instances.
V1 and V2 could potentially expose metadata unintentionally, while V2 token-only requires a valid token, making it more secure by design.
Improved Access Control:
V2 token-only allows you to implement fine-grained access control over instance metadata by controlling access to the token.
This is particularly important for multi-tenant environments or scenarios where you need to limit metadata access to specific processes or applications.
Avoiding Potential Information Leakage:
With V1 and V2, if you inadvertently leave sensitive data in instance user data or tags, it could be accessed without authentication.
V2 token-only mitigates this risk by requiring a valid token for access, reducing the chances of data leakage.
Enhanced Security Best Practices:
AWS recommends using V2 token-only for improved security best practices.
As a best practice, AWS continues to enhance security features, and V2 token-only aligns with this approach.
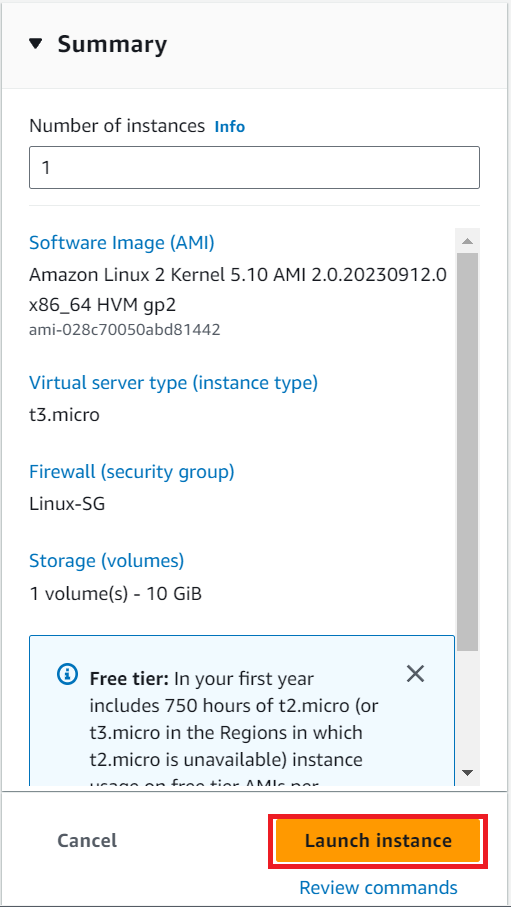
Review and Launch :
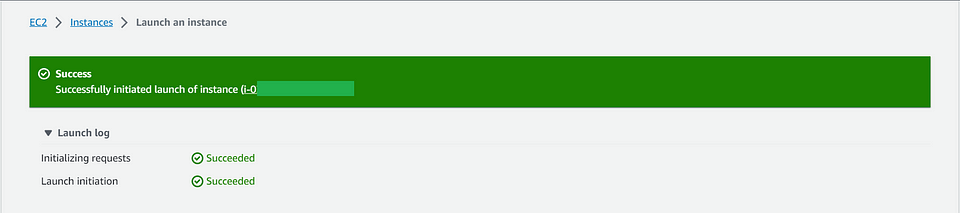
Once Reviewed — Click on “launch instance”
We have successfully launched the EC2 Instance.
Conclusion :
This Hands-on serves as a comprehensive and invaluable resource for CloudOps Engineers and IT professionals. This checklist offers a systematic approach to ensuring that Amazon Elastic Compute Cloud (EC2) instances are prepared for production deployment with efficiency and precision.
By following this checklist, CloudOps Engineers can confidently navigate the complexities of launching EC2 instances, covering critical considerations such as cost management, security, configuration, and best practices. The checklist not only accelerates the deployment process but also bolsters the reliability, security, and performance of the EC2 instances, setting the stage for a seamless production environment.
As cloud computing continues to play a pivotal role in modern IT operations, this checklist empowers CloudOps Engineers with the essential knowledge and steps needed to meet the demands of a dynamic and production-ready cloud infrastructure.